
View our roof rack video walkthrough here!
View our solar mounting video walkthrough here!
As always, consult the BEMM for manufacturer’s standards first for information and guidelines on ideal modifications.
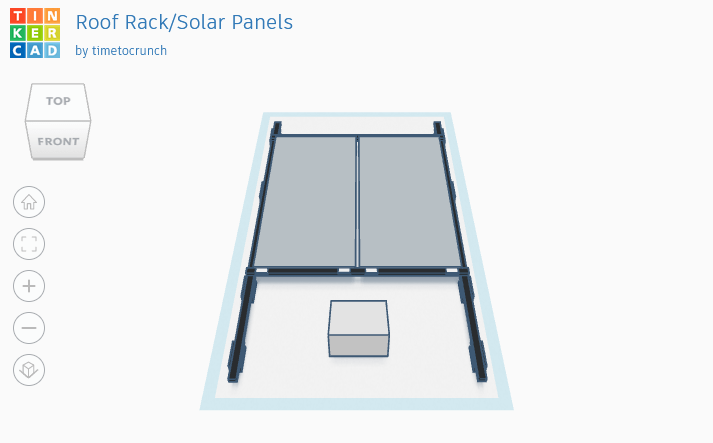
When mounting solar, you generally have the option to mount them to your roof using VHB tape mounts, fasteners, or to a rack using factory attachment points. We wanted to minimize additional holes (rust threats) and did not exactly trust non-mechanical fastening, so we decided on a roof rack. Prefabricated roof racks often cost over $1,000 and we wanted to save money where we could. This led us to DIYing our roof rack.
There are a lot of materials available to build a DIY roof rack, like aluminum extrusions (80/20, T-Slots, etc.), Unistrut/Superstut, or angled aluminum. Here are high level pros and cons that we saw with the various methods:
Aluminum Extrusions
- Lightweight
- Hard to source longer lengths without added shipping costs
- Adjustable without permanent modification
- Not exactly recommended to paint them (but can buy them in black)
- More expensive than other rail alternatives ($0.40-1.00/inch)
Unistrut/Superstrut
- Heavier (steel)
- Available at local hardware stores
- Adjustable without permanent modification
- Galvanized materials do not paint well
- Less expensive ($30.00/10ft)
Angled Aluminum
- Lightweight
- Available at local hardware stores
- Not adjustable without permanent modification (realistically you wont need to adjust things, though)
- Most affordable
We originally planned to use aluminum extrusions because it is lightweight, highly adjustable, and widely used. But we found it extremely hard to source the lengths in the format we wanted (even in Southern California!). We spent several hours contacting local distributors for the form we needed (Black, 15 series, tri-slot) but didn’t have any luck. It wouldn’t be as hard if we were okay with the standard silver, quad-slot extrusions, but we were picky on aesthetics.
Angled aluminum did not have the essence of modularity or adjustability that we were looking for (once you drill a hole in it, it’s there forever). We ultimately decided to go with Unistrut because it was available at our local hardware store in the lengths we needed, while being inexpensive compared to other rail-like alternatives.
With our rails selected, the next step was to decide how we would mount these rails to the van. The Ford Transit HR 148” has four standard attachment points on each side (8 total), with an M8 thread size. These attachment points are not square and have a slight 5-degree angle to them. The total load should not exceed 420 lbs total and 175 lbs at each attachment point. You also want the bracket to match the surface area of the attachment point pads for even weight distribution.
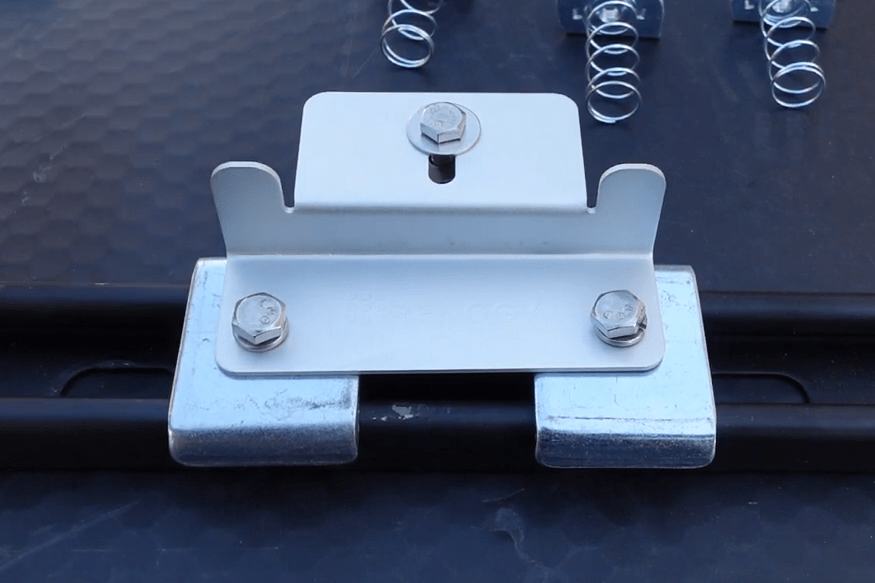
There are many different ways people assembled a mounting bracket (pivoting angle brackets, long bolts with spacers, aluminum tubing, etc.). But we wanted to follow the BEMM guidelines as closely as possible and bought prefabbed Ford Transit V2 Brackets from DIYVan. We purchased four pairs of brackets that include all the needed hardware (watch our roof rack video to see them in more detail). While they are undoubtedly not the cheapest option, we found them well worth it because they check all the boxes per the BEMM, look clean, and saved us more time/materials than we would have spent trying to DIY them.
With that out of the way, let’s get into the build!
Materials
For Rail Installation
- (4) DIYVAN Ford Transit HR Roof Mount Bracket V2 Pairs
- Includes (2) M8 1” bolts
- Includes (2) Washers
- Includes (2) Rubber Pads
- Includes (4) 1/4” Carriage Bolts and Nuts
- (16) Stainless 1” Washers (2 per bracket)
- (3) 10′ 14ga SuperStrut Slotted Channels cut into
- (2) 8.5′ Rails
- (2) 5′ Crossarms
- (4) End caps for Rails
- (1) Dicor Self Leveling Sealant (501LSW)
- (2) Rustoleum Self Etching Primer Spray Paint (Green)
- (2) Rustoleum Spray Paint (Flat Black)
For mounting crossarms to rails:
- (4) Galvanized 3/8” 1” Galvanized Bolts
- (4) Galvanized 3/8” Split Ring Washer
- (4) Galvanized 3/8” Washer
- (4) 3/8” Spring Strut Nut
For Solar Installation
- Renogy 400W 12V General Off-Grid Solar Kit
- (2) Renogy 200W Panels (58.70” x 27.5”)
- Premium Accessory Set
- (8) Renogy Z Brackets
- (8) Renogy 1/4” Nuts/Bolts/Split Ring Washer
- (16) Stainless 1/4” 1” Hex bolts
- (16) Stainless 1/4” Lock Washers
- (16) 1/4” Strut Nuts
- (16) 1/2” Saddle Washers (if using brackets upright)
- Larger diameter ensures the 1/4” bolt aligns with the strut nut
- (16) 1/2” Strut Washers (if using brackets upside down)
- Larger diameter ensures the 1/4” bolt aligns with the strut nut
For (Solar) Wire Entry Gland
- BougeRV Entry Gland
- Includes (3) self tapping screws
- (1) 7/8″ Grommet
- 1/2″ Butyl Tape
Tools
- Measuring Tape
- Hacksaw/Reciprocating Saw
- Heat Gun
- Plastic body picks
- Center Punch
- Metal File
- Acetone
- Microfiber/cleaning cloths
- Clamps
- Threadlocker
Instructions
Note: We will be going out of order from what we did in our video, since we didn’t go in the best order and want to share our lessons learned with you.
Prepare your strut channels
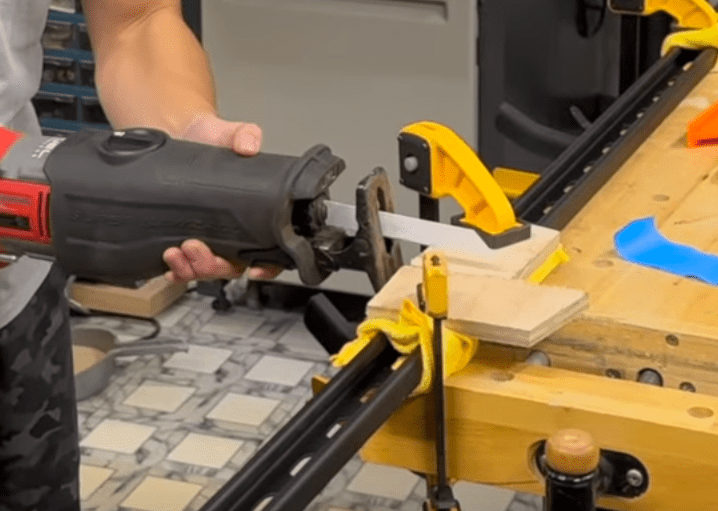
- With a hacksaw or reciprocating saw with metal blade, cut the (3) 10’ struts into (2) 8.5’ rails and (2) 5’ crossarms. You’ll have (2) 1.5’ segments of off cuts.
- Using the DIYVan brackets the 8.5’ rails leads to 2 slots-long in the front, and 3 slots-long in the back.
- Using the DIY Van brackets, the 5’ rails lead to 0 slots-long on the left, and 0 slots-long on the right. It fits perfectly.
- We clamped down two pieces of plywood, the width of our blade away, over our cut location to use as a jig to keep the cut straight.
- Deburr your cuts with a metal file.
- Wipe down your strut channel with a microfiber cloth and acetone to remove any oils.
- Apply two layers of Rustoleum Self-Etching Primer to the struts and let dry.
- Apply two layers of Rustoleum Flat Black spray paint (or color of choice) and let dry.
Prepare your Ford Transit’s attachment points
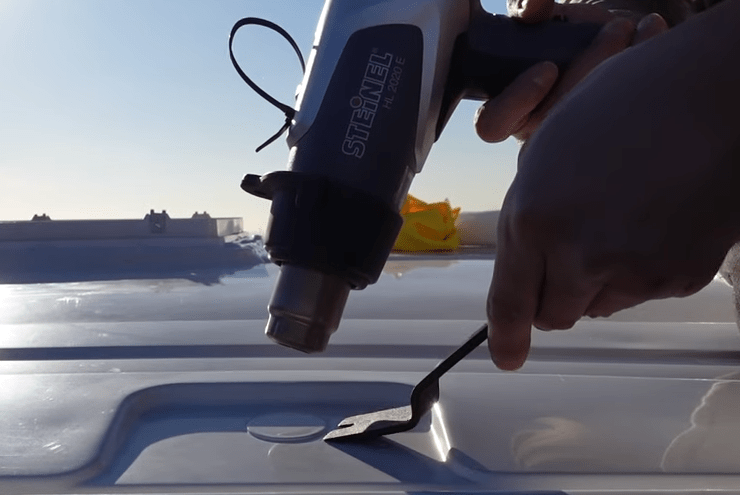
- With a heat gun and plastic body pick, heat up the painted plug of the attachment point and slowly pry it off. The attachment points sit in the recessed areas on your van roof.
- While the adhesive is still warm, scrape off as much as possible from the attachment point with your body pick.
- Clean off any residue from the surface with acetone and microfiber.
- If necessary, use a rotary tool (Dremel) to open up the hole in the roof panel so the M8 bolt can fasten into the M8 threads of the attachment point without rubbing against the roof body. Deburr and vacuum any shavings.
- Spray Rustoleum Primer over the exposed hole and surface area and let dry.
- Repeat for other attachment points.
Modifying the 8.5’ rails into alignment
- Apply the rubber gaskets to the base of the DIYVan mounting brackets.
- Hand-tighten the M8 bolt and washer through the mounting brackets to the van attachment points. Repeat for all attachment points.
- You want them to be snug so they won’t move but can still be adjusted. This is to ensure they are aligned square.
- We moved the brackets towards the innermost position, away from the sides.
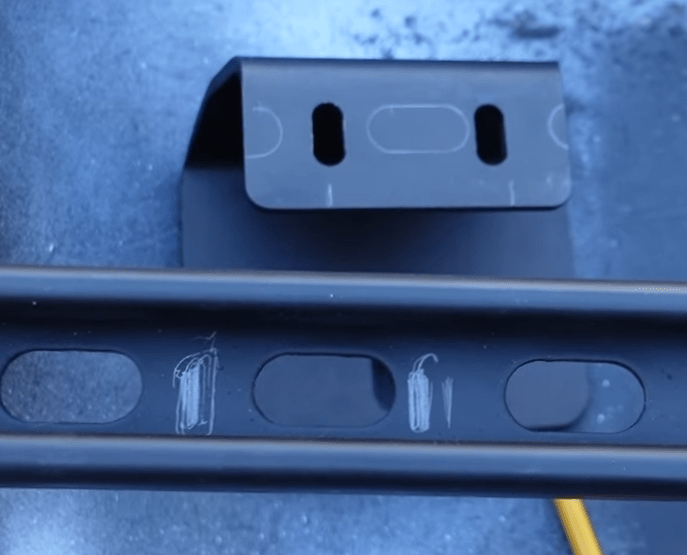
- One side of the van at a time, place the 8.5’ strut channel on top of your mounting brackets and align the bracket holes with as many strut slots as possible.
- Tip: Drop the carriage bolts through the strut and bracket to verify alignment.
- 3 of the 4 brackets lined up nicely. The one not in alignment was the second bracket from the front of the vehicle.
- Draw an alignment line on the strut and bracket, then trace the outline of the slots that do not align onto the bracket. This will help you locate where to modify the strut to fit the brackets.
- Our markings were at about 33 7/8” and 35 ⅝” from the front end of the strut.

- Using the alignment lines, mark the holes of the bracket onto the strut.
- Starting with a smaller drill bit and working your way to ¼”, drill through the strut. Use a center punch! If necessary, you can use a file to bore out additional material.
- Debur any rough edges with a file.
- Place this strut on top of the other 8.5’ strut, trace the drilled holes onto it, and repeat step #6.
- Touch up the exposed metal with spray paint.
Attach the 8.5’ rails
- Tighten the M8 bolt and washer through the mounting brackets to the van attachment points. Repeat for all attachment points.
- You want them to be snug, where it wont move on its own, but still able to be adjusted. This is to ensure they are aligned square.
- We moved the brackets towards the innermost position, away from the sides.
- One side of the van at a time, place the 8.5’ strut channel on top of your mounting brackets and align the bracket holes with the strut slots/holes.
- Tip: Drop the carriage bolts through the strut and bracket to hold it’s alignment
- Starting from your drilled holes, from underneath, hold the carriage bolt through the bracket and strut, place a 1” washer on top, and fasten the nylon nut using a socket wrench into the strut’s final positioning.
- It is ideal to have the bolt coming top-down so that if the nut comes loose, the bolt may still keep things in place. However, this would not work with the included DIYVan hardware. We acknowledge this, and plan to replace them if it becomes an issue.
- Repeat for the remaining brackets on this side of the van.
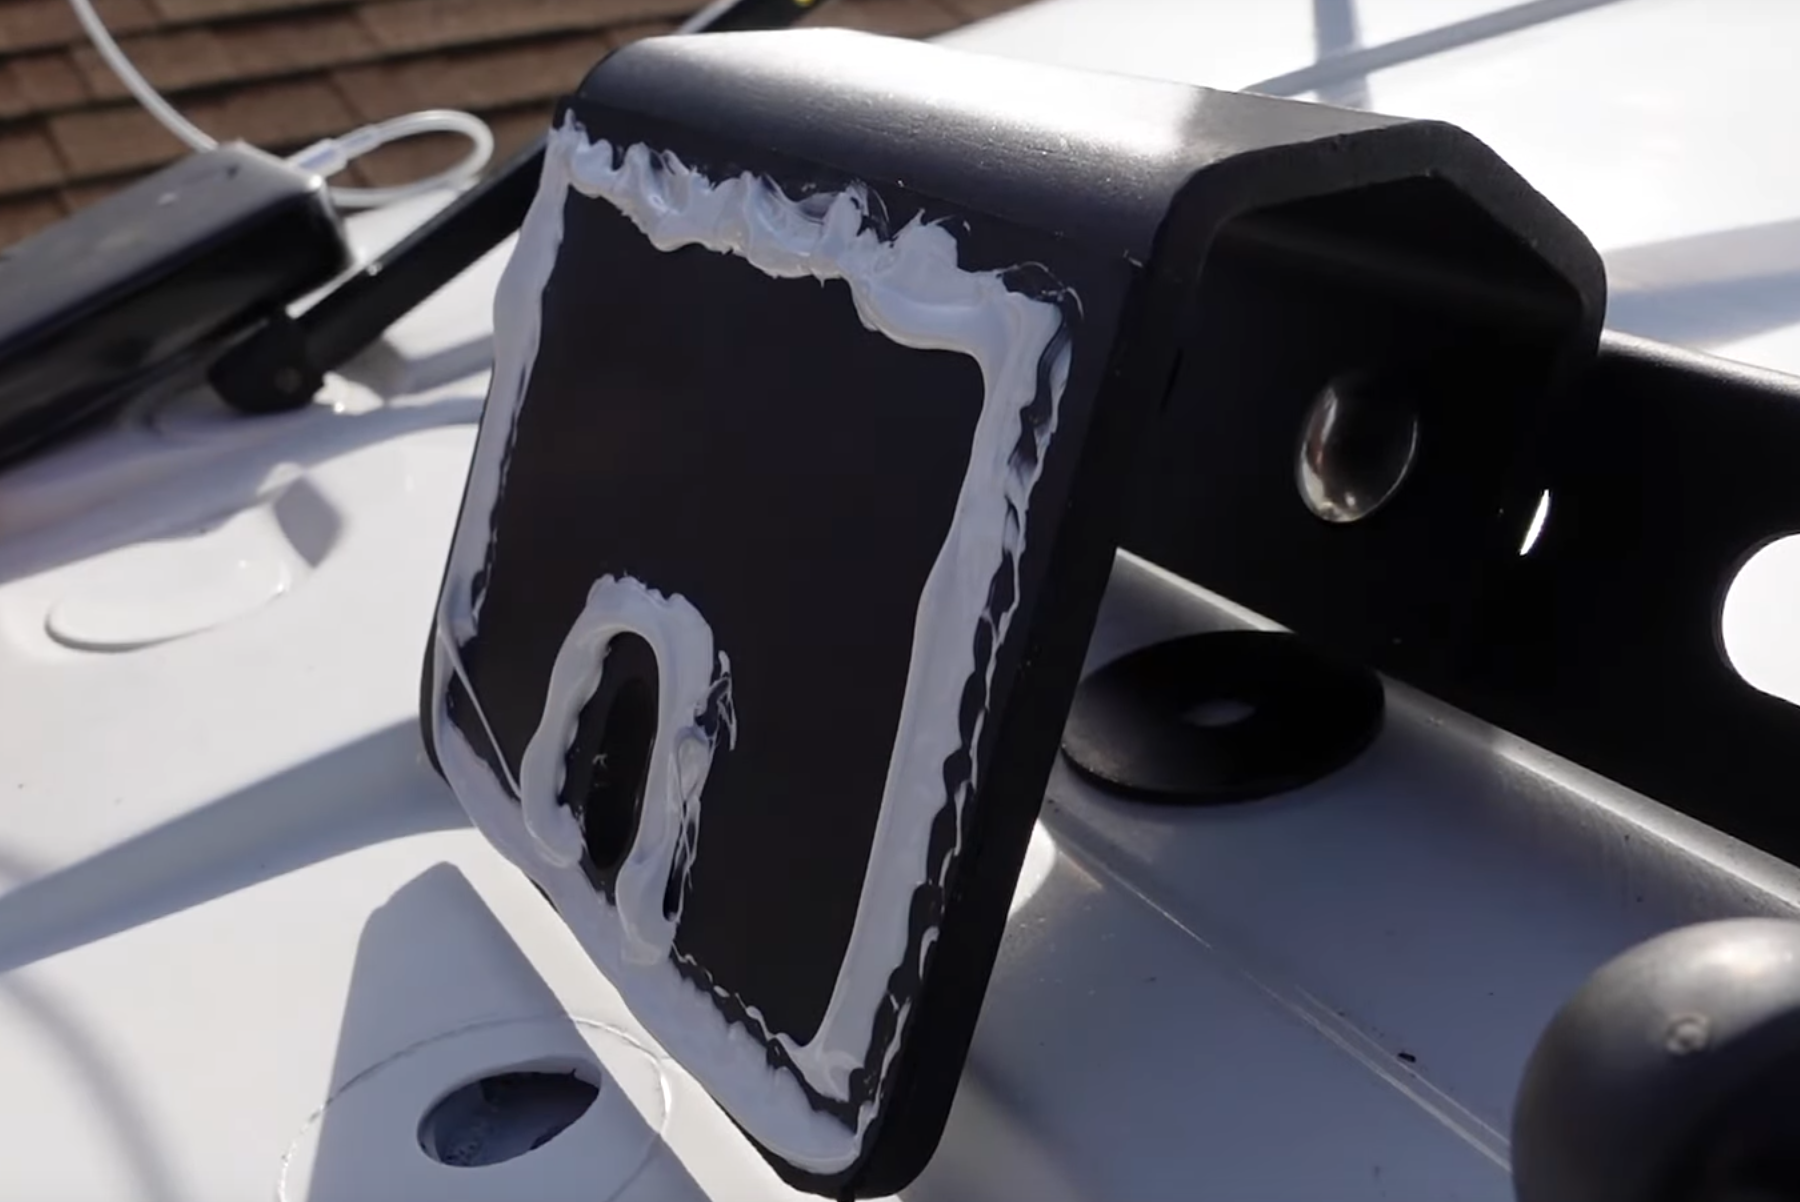
- With all bracket hardware tightened to the strut, remove the M8 bolts and washers affixing the bracket to the van. Rest this bracket and strut assembly on it’s side on the van’s roof to expose the rubber pads.
- Wipe the rubber pads and attachment points with acetone to remove any dirt/grease.
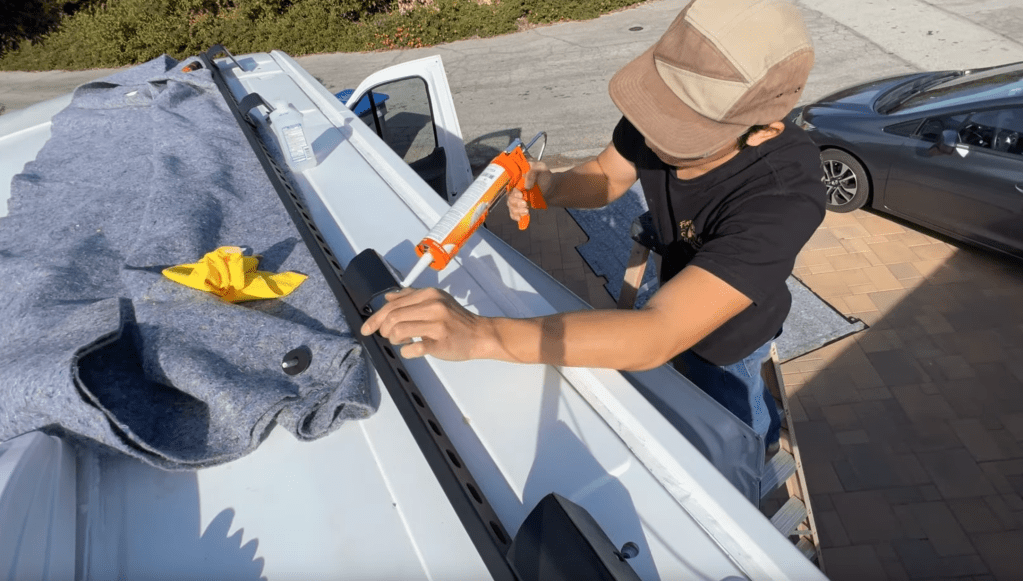
- Using a caulking gun, apply a bead of Dicor Self-Leveling Lap sealant around the perimeter of all the rubber pads and the M8 bolt holes.
- Flip the assembly over and align with the attachment points.
- The sealant may cause the assembly to slide down the roof contour.
- Finally, ensure alignment of the attachment points and use a socket wrench to bolt the M8 screw and washer, through the bracket, into the attachment point.
Attach the 5’ crossarms
- Place the cross arms across the width of your van (on top of your rails).
- We placed one on the first open slot behind the frontmost mounting bracket and the other 58.75” (the length of our solar panel) behind it.
- There is about 2” on clearance from the peak of the roof van to the bottom of the crossarms.
- Using a ⅜” 1” long galvanized bolt, washer, split ring, and strut nut, fasten one side of the cross arm to the mounted rails.
- On the other side of the crossarm, confirm you are perpendicular using a speed square, then tighten down the hardware.
- Repeat for the rear crossarm.
Preparing solar panels for mounting
- Attach z-brackets to the predrilled holes on the corners of the solar panels on the short side.
- At this point, we decided to mount our brackets upside down so our solar panels sink ~½” below the top plane of our crossarms. We had plenty of clearance (~2”) between the peak-of-the-roof and bottom of the crossarms. If you go this route, use ½” strut washers instead of ½” strut saddle washers if upright.
- With the panel upright, the bolts should point downward through the washer, solar panel, washer, split ring, and nut. Apply threadlocker if necessary.
- Bring your solar assembly to the van (with a helper), rest the z-bracket on your roof rails, and slide the assembly into position.
- For each z-bracket, fasten (2) ¼” x 1” long bolts through a lockring, z-bracket, strut saddle washer (if upright z-bracket) or square washer (if upside down z-bracket), and ¼” strut nut.
Installing your Wire Entry Gland
- With a heat gun and plastic body pick, heat up the painted plug of the pass through hole and slowly pry it off.
- We chose the most rear passenger side pass through hole.
- While the adhesive is still warm, scrape off as much as possible from the attachment point with your body pick.
- Clean off any residue from the surface with acetone and microfiber.
- Spray Rustoleum Primer over the exposed hole and surface area and let dry.
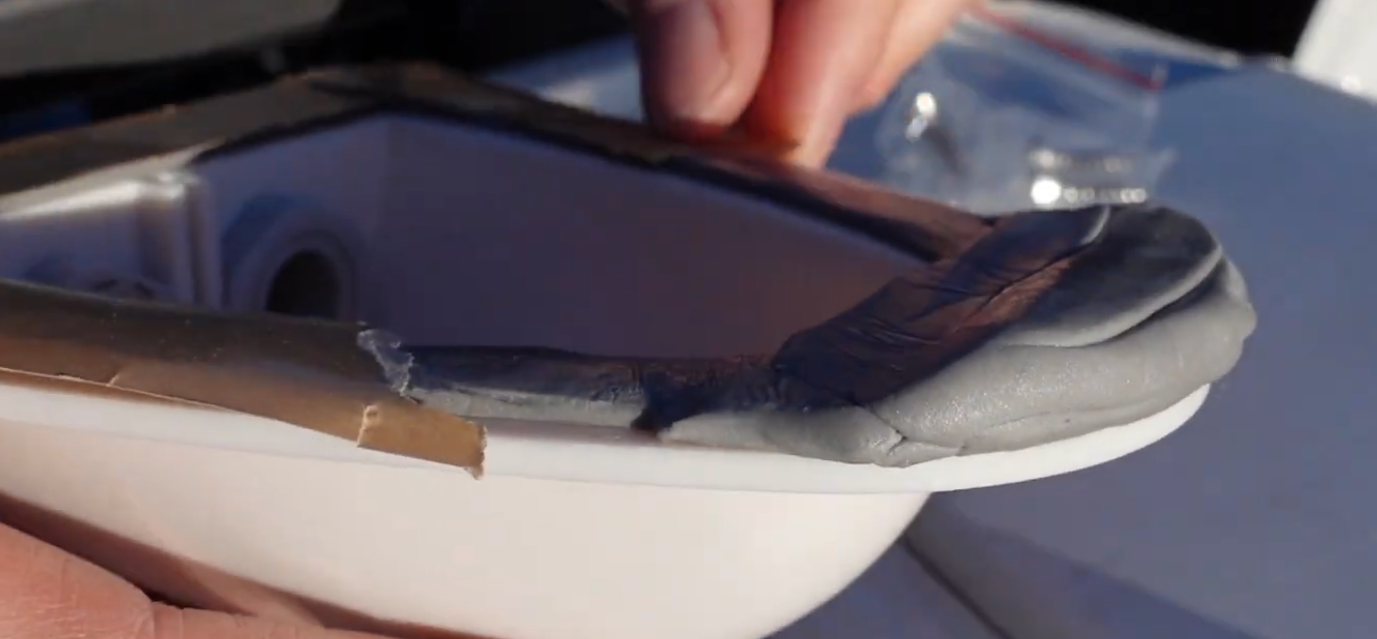
- Place a 7/8″ grommet around the edge of the hole.
- Apply butyl tape around the perimeter of the Entry Gland. If necessary, apply multiple layers to cover recessed surfaces of the roof panel.
- Apply Dicor Self-Leveling Lap Sealant on top of the butyl tape.
- Place entry gland on top of pass through hole.
- Fasten the (3) self tapping screws through the Entry Gland to the van body.
Now you should be ready for wiring! We haven’t gotten there yet, so stay tuned for the next blog!
*Subscribe to stay up-to-date with new blog posts & follow our van build journey*
